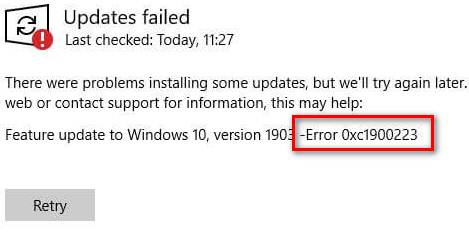
The Error code 0xc1900223 is a common in Windows update that occurs when you try to upgrade your system to a newer version of Windows. This windows 10 Error code 0xc1900223 usually indicates that there is some problem with the update process, and it can prevent you from installing the latest version of Windows on your computer.
There are several reasons why you might encounter this windows 11 update error code 0xc1900223. Some of the most common causes include issues with your system’s hardware or software, problems with your network connection, or conflicts with other programs that are running on your computer.
If you encounter the Windows update 0xc1900223 error code while trying to update your Windows system, there are several steps you can take to try and resolve the issue.
Here are a few possible solutions To Fix windows 10/11 Update Error code 0xc1900223
Check your network connection:
One common cause of this windows 10/11 update Error code 0xc1900223 is a poor network connection. Make sure your computer is connected to the internet and try again.
Disable any third-party antivirus software:
Antivirus software can sometimes interfere with the update process. Try disabling any third-party antivirus software on your computer and see if that resolves the issue.
How to temper disable Antivirus
Open Antivirus application (McAfee or Norton or AVG) installed on the computer.
Click on settings and go to real time protection.
Select Turn Off real time protection.
Navigate to Antivirus firewall and select Turn off Antivirus Firewall.
How to disable windows defender
Open Windows Security
Open Virus & threat in windows security window
click on Manage settings, under Virus & threat protection.
Switch Real-time protection to Off
Disk Clean up:
You may not have enough disk space available on your computer to install the Windows update. Try deleting any unnecessary files and programs to free up space.
Disk clean-up is the process of removing temporary and unnecessary files from your computer’s hard drive. Here are the steps to perform disk clean up on a Windows computer:
- Open the Disk Cleanup tool: Click on the Start menu and type “Disk Cleanup” in the search bar. Then click on the Disk Cleanup app that appears in the search results.
- Choose the drive you want to clean up: If you have multiple drives, select the one you want to clean up.
- Select the files you want to delete: The Disk Cleanup tool will scan your drive and show you a list of file categories that you can delete. Check the boxes next to the categories of files you want to delete.
- Review and confirm deletion: Before deleting files, you can review the amount of space that will be freed up. Once you’re sure, click on the “Clean up system files” button at the bottom of the window to delete the selected files.
- Wait for the tool to complete the process: The Disk Cleanup tool will begin deleting the files you selected. Depending on the size of the files and the speed of your computer, this may take a few minutes.
- Restart your computer (optional): Once the tool has finished deleting files, it may prompt you to restart your computer. If so, it’s a good idea to do so in order to complete the cleanup process.
- That’s it! By following these steps, you can free up valuable disk space on your computer and improve its performance
Windows Update your drivers:
Outdated or incompatible drivers can cause issues during the update process. Make sure all your drivers are up to date before trying to install the windows 10/11 update.
Run The media creation tool :
The Media Creation Tool is a program developed by Microsoft that allows users to create a Windows installation media such as a USB drive or a DVD. Here are the steps to run the Media Creation Tool:
Go to the Microsoft website and download the Media Creation Tool. You can search for “Media Creation Tool” in your preferred search engine, or you can go to the following URL: https://www.microsoft.com/en-us/software-download/windows10.
Once you have downloaded the Media Creation Tool, double-click on the file to launch it.
- When prompted by User Account Control (UAC), click “Yes” to allow the tool to make changes to your device.
- The Media Creation Tool will then ask you to accept the license terms. Read through the terms and click “Accept” if you agree.
- The next screen will ask you to choose whether you want to upgrade this PC now or create installation media for another PC. Select the option you prefer and click “Next”.
- If you chose to create installation media, select the language, edition, and architecture you want to use. If you’re not sure what to select, you can leave the default options as they are. Click “Next” when you’re ready.
- Select the type of media you want to create. You can choose to create a USB flash drive or an ISO file. If you choose to create a USB flash drive, you’ll need a USB drive with at least 8GB of free space. Click “Next” when you’re ready.
- Choose the drive or location where you want to save the installation media. Make sure you have enough space on the selected drive or location. Click “Next” when you’re ready.
- The Media Creation Tool will now download the Windows files and create the installation media. This process may take some time, depending on your internet connection speed and the speed of your device.
- Once the process is complete, the Media Creation Tool will let you know that your installation media has been created successfully. If you created a USB flash drive, you can use it to install Windows on other devices. If you created an ISO file, you can burn it to a DVD or use it to create a bootable USB drive.
- That’s it! You have successfully run the Media Creation Tool and created a Windows installation media.
- Conclusion
- If you have problem while doing this method, we recommend you to chat with our online experts. I am sure they will guide you and help resolve this issue. You can also visit website for more details and more information.
-

Chat with us
Recent Posts
-
Troubleshoot this Office Installation Error Code 1603 October 22, 2024
-
How to Speed Up Windows 11: Troubleshooting Error Message October 22, 2024
-
Fixing the Windows Update Error KB5040442 October 22, 2024
-
Fixing the Windows Error Code 0x80080005 October 22, 2024
-
Troubleshoot the Windows Error Code 0x800b0109 October 22, 2024